Friday 28 June 2013

Getting connected!

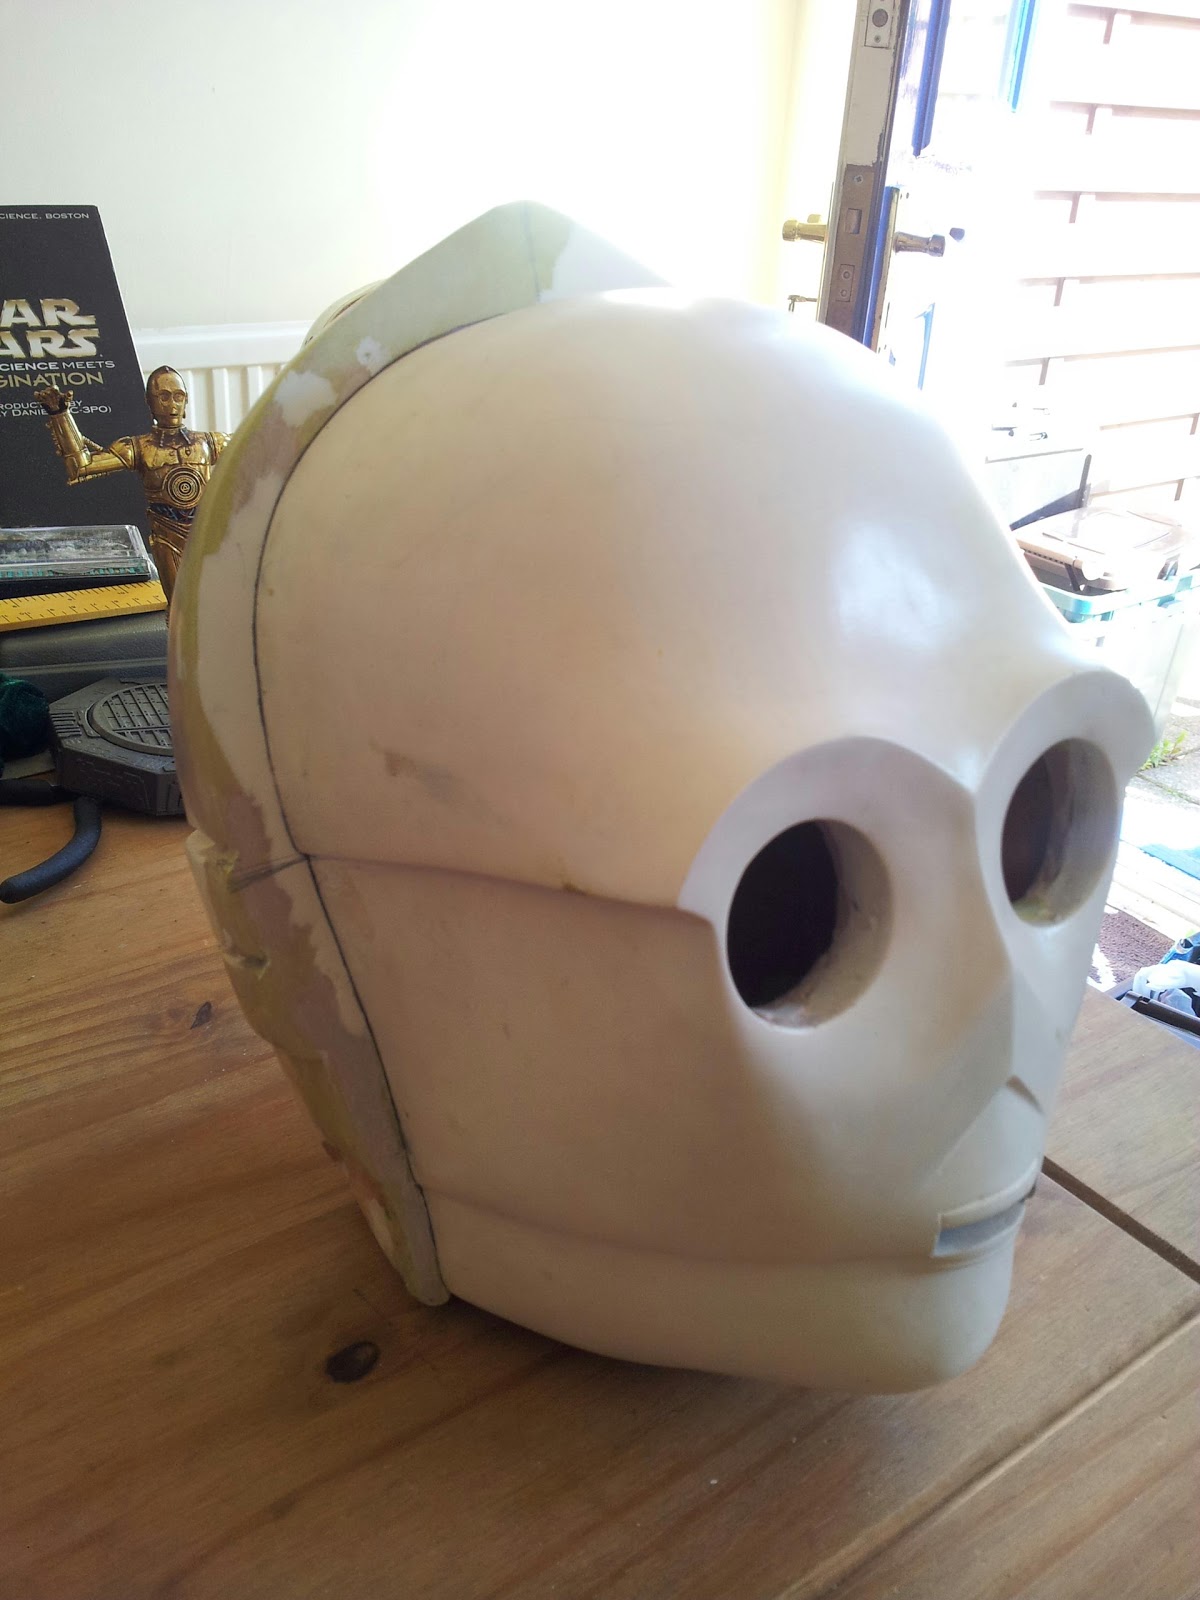
After a lot of thought, even more research I've decided to connect the head using a method simular to the screen used 3po. I've  used a small brass hook (eye?) on the face top and same connectors I used on the neck bolts. All a bit tricky but after using a little bit of Milliput was able to disguise the work done :-).
The photos make a bit more sense than my rambling!

Wednesday 26 June 2013

A pain in the neck!

Neck bolts have been a bit of an ...... well let's keep things clean :-). Quick photo to show what I've  used to get my neck bolts connect things together. Lots more to get things perfect but fingers crossed this looks like it may work x

Tuesday 25 June 2013

I knew all along it had to be a mistake

So in the last couple of days I've been sanding (I know!) as well as trying to fit a few things together. Neck bolts argghh! and the wonderful Gordon Tarpley neck collar (see iamc3po.blogspot.com, thank's GT). Lining everything up whilst trying it on is a nightmare! I've also done a couple more coats of undercoat. Here are the results so far :-).
More soon xx

Saturday 22 June 2013

What have we here?

So after a day marking and dremelling out the halo, drilling out the holes for the neck bolts and antenna, I had 5 minutes spare to give the whole head a quick undercoat and this is the result!
:-)
Lots still to do!

The odds of getting this done are....

Never tell me the odds!!
2 hours done and making progress, particularly pleased that the antenna fits so well. Tea break and a biscuit then back to it!

How did we get into this mess?

So the dremelling begins. First one done, 20+ more to do!! Anyway must crack on, more soon x

Friday 21 June 2013

Halo my master will be with you shortly

So this evening I've marked out basically where the indentations will have to go in the halo of the mask. Measuring and then checking various photo references and hopefully, now, it's ready to dremel out.... Gulp! Getting nervous as once I start... Well you know!
It's times like this I wish I had a mask with nothing needing doing other than priming and painting!
Rest now, lots to do tomorrow! :-)

Thursday 20 June 2013

Dremel fun!

So today it's been all about sorting the back of the head. My trusted Dremel and a VERY steady hand and this is the results so far!! Oh and some sanding!
I so want to paint and start with the undercoat but I keep finding areas that need sanding or filling. Patience spose :-(

Wednesday 19 June 2013

I wonder......?

Thinking of using this screw, bolt thingy I salvaged when breaking up some old wardrobes. They are used to join two wardrobes together. Thinking of fixing one end to the neck collar piece and the other to the resin bolt head, then hopefully it will all screw together!
What do ya think? Good idea or just stop it Sarah?

I'm not getting in there... Oh no!

Ok I couldn't resist a photo on a sunny day in the garden, let's hope the neighbours don't see!
First official test wearing has gone well :-), a bit snug and will need some padding here and there but it stays together well, even without head and neck bolts! Picked up a cheap balaclava on ebay to help keep my hair in place :-). A bit claustrophobic in there, but also lots of laughter!!
More soon :-)

Sunday 16 June 2013

At last where have you been?

Yet another update, shaper edges and almost there with the area around the ears. Conflicting photos and reference material makes it difficult to get things spot on sometimes, but on we go....
Now have to figure how to accurately make all the markings and indentations in the halo???
Fine sanding too!

Friday 14 June 2013

Oh my!

So as promised, 3 photos of the two halves fitting (rather well :-)) together.
Lots still to do, smoothing out bumps, getting edges true and sorting out the ears sections (because they look rubbish at the moment) but getting there slowly.
Back to the sanding after the filler has dried!

Thursday 13 June 2013

Before and after

Progress so far, sanding, filling, leveling then more sanding!! Coming along nicely and the two halves now fit. Photos v soon x

Fitting progress

After lots (and lots) of research it became clear the two sections of my head had to have fixing points. I may be a bit dumb but for a while I couldn't work it all out! When I did source photos of the two (separate) sections I had to figure out how to adapt things for my project.
Neck bolts and crown bolt (antenna) will have to come later, using fibreglass sheeting I created a guiding edge and neck fixtures, hopefully the photos make some sense of what I've done. I've strengthened with Milliput and although it looks a little rough atm, it kinda works :-).
More soon Sx

E-3PO

Tc14 's cousin?
E-3PO

Lego Tc14

Here she is in all her Lego finery

How rude!

Obtaining a full suit seems to be my next, and the biggest challenge. There are some very good options in the US, but maybe for ease I should try sourcing items in the UK?
Any ideas out there? Any advice will be gratefully received :-)

Wednesday 12 June 2013

oooh how horrid !


So Milliput is starting to work!
The back of the head is a lot smoother (yes lots of sanding and stuff still to do)
There is 'some' shape to the whole head and we have the 2 parts
together for the first time!
There's still some shaping of the ear section (lots of picture references , measuring and a keen eye!!!) but I have a smile on my face for the first time.
Must dash all this sanding is ruining my nails!!!

more soon....

Look into my eyes

so, the EYES!
After bags of research and messing with fairy lights and lights from model shops (and some scratching of heads) I found these Rice lights on eBay for £3.69 with free posting. Their tiny, and on a copper insulated wire, and come with a small battery pack (mine has 2 batteries ). They really work well, I feel .
After a bit more messing (and a little bit of swearing ) , with the aid of a borrowed soldering iron, I was able to cut off the 6 bulbs I needed and attach them to the power supply and.....Vwallah!!!
The droid can see!


Tuesday 11 June 2013

Back of the 'ead

Phew. More sanding n stuff. Difficult!!!
(you still reading!?)

It's not symmetrical...it's not level...lots of filler...there's no halo on the front...no way it can join with the face-part at the moment... :-(
All these things need figuring out!

"Milliput" (superfine filler) is my new best friend!!
("getting to think this is a bad idea!!!!")

Here's some piccies.


The Face


The face!
Ok I've decided to go with an old fibreglass head I've had for a long time. It needs a lot more work but has sharper edges and looked more accurate. So the face. The main issue is the chin area. I've started to add fibreglass filler to make it more symmetrical, still will need alot for sanding and shaping, more pictures soon :-).

Here's where the fun begins


'Here's where the fun begins'

I've had some of these items for a few years now with the intention of building a 3po costume but added the vacuum formed head
from eBay recently to help me kick start my build. The VF head although not as sharp as I'd like wasn't too expensive and gave me lots of extra items I didn't have, the halo, good eyes and neck bolts, plus some ideas of how to proceed.
C3po builders forum have been a huge resource of information and I'm in awe at some of these guys work. Lets hope I can achieve something close to their examples!!